How To Tell if Motherboard Is Dead: Diagnostics for Beginners

After countless hours of gaming, content creation, and continuous operation, your PC suddenly crashes. What could you do then?
While taking a trip to the nearest computer tech could be your first instinct, you can try out a few tricks to identify the problem yourself.
Since owning a computer seems to be essential for your day-to-day activities, you might as well learn how to tell if motherboard is dead.
Diagnosing problems on a motherboard can be very frustrating, especially because finding the root cause requires testing all the components.
Causes of Motherboard Failure
Before going over the symptoms of motherboard failure, it would help to learn about the many factors that can implicitly cause them to fail.
Go over these factors one by one, and you’ll surely set up your rig for several years of reliable functionality.
We also have a whole article explaining different approaches to motherboard testing, including what you can do to avoid motherboard problems.
ALSO READ: How To Tell if Power Supply Is Bad or Motherboard Is Defective
1. Overheating and Excessive Overclocking
Computer enthusiasts make a lot of preparations before they resort to overclocking their computer systems.
Without these, excessive overclocking can damage your motherboard in so many ways, rendering it useless.
Some things to avoid when overclocking include overvoltage allowances and overheating.
Repetitive and excessive overclocking can decrease the lifespan of a motherboard if you don’t keep high input voltages and overheating in check.
Be sure to have adequate cooling devices voltage controllers on your motherboard, such as fans, heatsinks, and VRMs.
2. Power Spikes and Surges
Sudden, short-lived bursts of energy in an electric circuit are also called electrical spikes or power surges.
Power surges occur with power-hungry appliances, faulty wiring, or unreliable external power service.
A power surge also happens when a lightning strike hits electrical systems.
Lightning strikes are the number one source of power surges that can ruin a perfectly good electronic device.
The primary reason an Automatic Voltage Regulator (AVR) is an essential device for computers is it keeps input voltages from fluctuating outside tolerable voltages.
If you connect your computer directly to a wall outlet, you cannot protect its components from frequent electrical output fluctuations.
The motherboard is no exception.
After all, it contains delicate circuits that can be easily damaged even by the slightest power surges from any source.
3. Short Circuits
A short circuit is an irregular connection between two parts of an electric connection intended to have different voltages.
When a system shorts a circuit, its components can receive irreversible damage from overheating, a fire, or an explosion.
Short circuits also result from power surges when an electrical system cannot tolerate the energy inputs.
4. Dust, Particles, and Debris
The longer you use a computer, the more the delicate circuitry inside the enclosure collects dust, particles, and other debris.
If you don’t give your computer periodic cleaning and maintenance, the dirt accumulates and acts as a conductive material that causes short circuits.
While standard compressed air dusters can come in handy for periodic cleaning, it is also important to avoid activities that can harm your computer systems.
One of the activities bad for electronic components is cigarette smoking.
The tar in cigarette smoke mixes with the dust and particles on your computer and forms into a sticky, gooey substance.
And we all know how a sticky, gooey substance is almost as conductive as liquids.
5. Moisture and Liquids
Water and electricity are two essential resources for human habitation, but they do not work well together under any circumstances.
Water, especially water with impurities and high temperatures, is an excellent conductor of electricity.
Just imagine how many short circuits your motherboard will have to withstand.
Prevent your computer from spills and moisture by positioning it in a more appropriate location.
Avoid putting your computer in low places and areas where air conditioning is inadequate and ambient humidity is high.
6. Physical Damage
During transportation or assembly, dropping your motherboard or computer can cause physical damage, enough to change the polarity and stagnate the electronic connections.
Dents, burns, and similar physical damage can also render your motherboard inoperable.
Be sure to transport your PC hardware and assemble its components with the utmost care.
In doing so, your computer will last longer without any physical damage.
7. Wear and Tear
Unlike all the other possible causes of motherboard failure, wear and tear are the two things that are pretty much inevitable.
Year-round innovations in computer technology take a toll on pre-existing components that are already in the market.
As a motherboard does all of its functions for several years, it gets subjected to wear and tear.
The more you grind its built-in functions, the quicker it gets older, ages, and diminishes in quality.
On another note, moving parts are more prone to wear with continuous operation.
Computer fan motors have mechanical parts that are the most common victims of wear and tear.
However, malfunctioning cooling peripherals can result in overheating and eventually motherboard malfunctions.
Diagnostic and Debug LEDs
If you don’t want to go over the tedious steps in the next section, take advantage of onboard indicators.
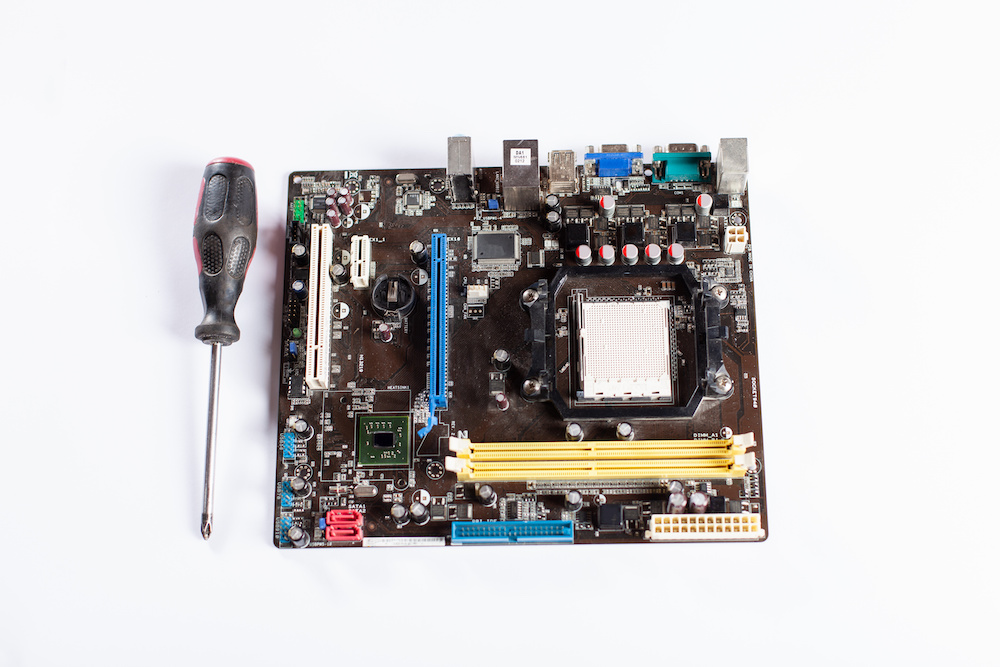
Most motherboards have built-in diagnostic systems in the form of red LEDs.
A red light on your motherboard can quickly point to the culprit causing the malfunction.
These LEDs have small labels beside them, indicating which of the attached components is not working properly.
Some motherboards even have a small built-in display showing error codes corresponding to specific malfunctioning hardware.
How To Tell if Motherboard Is Dead
Now that you know what causes motherboard failure, you are a step closer to identifying the root cause of potential motherboard problems.
We can now discuss the symptoms that indicate when a motherboard is already dead.
1. Absence of POST Beep
One way of checking if your motherboard is having problems is running a Power-On Self-Test (POST).
As you power up your PC, wait for a short beep from the small onboard speaker on your motherboard.
The short beep indicates a successful POST.
A successful POST means your system has the requirements and hardware connections to power up correctly.
After the short beep, your computer proceeds to display Windows.
In many cases, the absence of the POST beep is indicative of a failing motherboard.
2. Crashes, Freezes, or Glitches
When you have glitches on your computer or when it crashes or freezes intermittently, it can indicate that your motherboard is dying.
Sometimes, when your computer crashes, your display monitor shows the infamous Blue Screen of Death (BSOD).
However, these symptoms are not the ultimate indication that your motherboard is dead.
Other underlying factors can cause crashes and glitches, and it could indicate that some attached components may be malfunctioning.
3. Excessive Slackening
Aside from crashes, glitches, and BSODs, another more annoying indication that your motherboard is slowly dying is a curious case of slackening.
You notice your computer running too slow all of a sudden, and you don’t know what’s causing the sluggishness.
Computer applications are loading at a much slower rate than usual, and the system does not recognize keyboard keystrokes and mouse inputs as fast as it should.
Signs of excessive slackening are pretty easy to find, and they don’t necessarily mean your motherboard is at risk of failure.
These symptoms simply mean your PC is in rough shape.
4. Does Not Detect Hardware
The only way to ultimately determine whether your motherboard is dead is by carefully checking all of the attached components.
More often than not, a motherboard that seems dead is only malfunctioning because it does not detect one or more of the attached hardware.
To perform a complete checkup, you will require a second set of compatible components.
In other words, you will need a complete working computer with components similar to those on the system you want to check.
Before doing anything, check our instructions for installing and replacing motherboards and their components.
Start with the assumption that your motherboard is working just fine, and follow these steps:
Step 1: Swap.
Remove the components from the motherboard on the faulty rig (rig A) and swap them for the parts on the completely functional rig (rig B).
These components include the Power Supply Unit (PSU), CPU, RAM modules, graphics cards, and storage devices.
Step 2: Test.
After fitting the components from rig A into rig B, switch rig B on and wait for the POST beep.
If everything goes well and rig B proceeds to start up, it means the components from rig A are working fine, and the motherboard from rig A must be dead.
Otherwise, one of the components that you just swapped into rig B must be faulty, and the motherboard on rig A might still be functional.
Step 3: Verify.
From here on out, you can install the components you removed from rig B onto rig A, after which you can perform a POST on rig A.
If rig A powers on just fine after replacing the components, then the motherboard you are testing is still alive and well.
However, if it still has the crashing, freezing, glitching, slackening, or BSOD symptoms, your motherboard must be pretty dead.
RELATED: How to Replace a Motherboard (Guide)
Conclusion
Now that you know how to tell if motherboard is dead, you should have a pretty good idea of what to look for in your next motherboard.
The latest motherboards for Ryzen will have highly durable components, exceptional power delivery features, and damage-preventive properties.
You can also find the same features in the best motherboards for Intel-based processors.
Whatever the case, electronic components, including motherboards, will only last with the proper maintenance it deserves.
Furthermore, you should always limit utilization according to their specifications.
After all, motherboards contain materials that degrade and lose value over time.
If you always expose them to debris and substances that they should be protected from in the first place, you cannot expect them to last as long.

