How To Enable Motherboard HDMI: Tips and Instructions
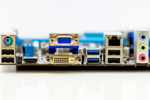
Motherboards with HDMI ports built into their rear panels support CPUs with integrated graphics chips.
This is great for gamers that want to connect a massive video screen.
They enable you to have display outputs without having to install any third-party video or graphics cards.
Even so, many PC users tend to install a dedicated graphics card, permanently disabling the motherboard’s built-in HDMI ports.
While display ports on the graphics card are sufficient for having multiple displays, some users may require more display connectors.
Learning how to enable motherboard HDMI ports even with a GPU installed allows you to restore the functionality of all of the available connectors.
Integrated Graphics
Today’s processors integrate a graphics processing unit (GPU) into the same die or chip as the CPU.
CPUs with integrated graphics cancel the need for a dedicated GPU, giving consumers access to more affordable builds.
For the complete functionality of a CPU with an integrated GPU, a motherboard must have built-in connections for display output.
The most common display connectors you can find on a motherboard today include VGA, DVI, DisplayPort, and HDMI.
What Is HDMI?
HDMI stands for High-Definition Multimedia Interface, a type of connector on electronic devices that simultaneously transmit audio and video.
In older computer models, motherboards were so rudimentary that they only connected and supplied power to the essential components.
Furthermore, CPUs did not have any built-in graphics controllers that allowed a serial connection between a motherboard and a display monitor.
The only way to have a display output was to install a video or graphics adapter on any of the PCI slots on a motherboard.
Since computers offer a wide range of functions that require audio and video output, manufacturers started making display output a necessary component for motherboards.
ALSO READ: Motherboard HDMI Not Working
Other Types of Display Connectors
While we should be focusing on how to enable motherboard HDMI, it will ultimately allow the use of the other display connectors built into your motherboard.
With that said, learning about the different display connectors will also help you decide if you really need to enable them.
VGA
VGA is the old-school connector, but it still exists in many motherboards today.
Although it can provide excellent frame rates and high display resolutions, it uses an analog signal that is not as reliable as the digital signals used by other connectors.
DVI
DVI is somewhat similar to HDMI because it delivers high resolutions at reliable frame rates using digital transmissions.
However, DVI connections do not typically transmit audio signals.
DisplayPort
DisplayPort connectors are one of the latest computer connection formats available on computer components.
They are capable of 3,840 by 2,160 pixels at 60 frames per second.
Can I Enable Motherboard Display Output?
If you have a CPU with integrated graphics and don’t have a dedicated GPU, the built-in display connectors are probably what you’re using right now.
In this case, you don’t have to enable any of the motherboard HDMI and other display connectors as they are already active.
The only time you will need to enable onboard HDMI is when you have a dedicated GPU, and its connectors are not enough for your display requirements.
With a dedicated GPU installed, you may have experienced zero display output while installing your display monitor for the first time.
You could only get your display running smoothly after transferring the connection from the motherboard HDMI to a similar port on the GPU.
The main reason behind this problem comes from having a dedicated graphics card.
The dedicated GPU automatically and permanently disables the built-in HDMI and other display connectors on the motherboard.
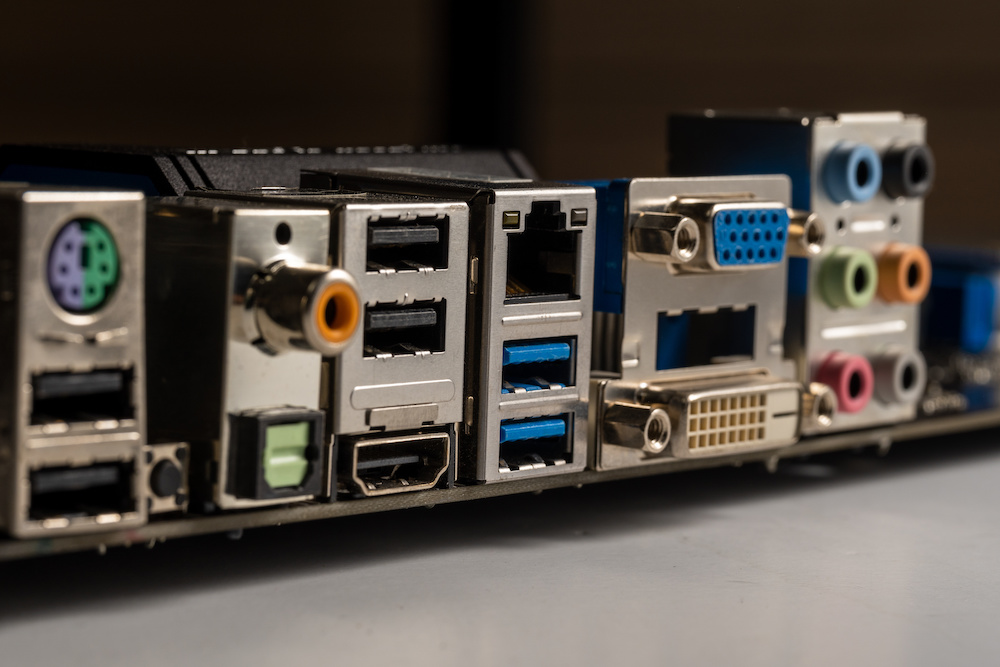
Do I Really Need to Enable the Onboard Connectors?
Let’s say you’ve been using a dedicated graphics card for some time now.
Have you recently decided to use two or more monitors, but your graphics card only has a single HDMI port?
You don’t have to enable the onboard HDMI on your motherboard just yet.
Dedicated graphics cards typically have more than one display output connector, but they may be using formats other than HDMI.
If your dedicated GPU has a free DVI or DisplayPort connector, you might want to consider getting a display monitor with either of those connectors.
You can also try using adapter cables with different ends compatible with your GPU and display.
For example, a DVI-to-HDMI cable allows you to connect the DVI port on your GPU to an HDMI port on your additional screen.
Only enable the onboard display connectors on your motherboard after maxing out all the available connectors on your GPU.
Nevertheless, if you are adamant about enabling the onboard connectors, there is one tiny issue you might have to check before doing anything else.
Issue of Usability
Having onboard HDMI on your motherboard doesn’t necessarily mean you can enable and use them for more screens at a time.
Your onboard HDMI and other display connectors will only work if your CPU has integrated graphics.
Before changing any of your motherboard settings for using the onboard connectors, it is wise to thoroughly assess integrated graphics capabilities.
Among the two most popular CPU manufacturers, Intel offers a wide range of CPUs with Intel HD Graphics.
If your system has an Intel Z390 chipset motherboard, it will work perfectly well with three displays using integrated graphics.
On the other hand, AMD continues to broaden its product line by producing processors with built-in Radeon Graphics.
With any of the best X470 chipset motherboards, you might also have any of the Athlon and Ryzen processors with Radeon Graphics.
How To Enable Motherboard HDMI and Other Display Outputs
The following steps will specify every move you have to make to enable onboard display connectors on your motherboard.
Step 1: Verify That Your CPU Has Integrated Graphics
The Intel website features a convenient CPU database that clearly states all underlying specifications.
Conversely, as long as you have the specific model for an AMD processor, sifting through the AMD website will give you a clear view of its specs.
To find out if your CPU can process display outputs through the onboard connectors, check if it carries integrated graphics through the manufacturer’s website.
These procedures will tell you how to get the specific model of a CPU installed in a system using Windows 10:
Step 1A. Open the Windows 10 Settings app by typing “Settings” on the Search menu of the taskbar.
Alternatively, you can press the Windows and “i” key on your keyboard to launch the Settings App.
Step 1B. In the Settings app, click on “System” to open the system settings.
Step 1C. On the bottom of the left-side panel, click on “About.”
Step 1D. Find your system’s CPU model under “Device specifications” beside the label “Processor.”
After getting the specific model of your processor, proceed to the manufacturer’s website and check the specifications for integrated graphics.
Step 2: Use the BIOS UEFI to Enable Integrated Graphics
Once you verify the presence of integrated graphics on your CPU, you can proceed with enabling the onboard HDMI and other display connectors.
The BIOS UEFI is an essential component of a computer’s system startup sequence.
Carelessly manipulating the settings within BIOS without the proper know-how may render your computer unusable.
Remember to change only the settings for enabling integrated graphics unless you have read on other topics regarding other BIOS adjustments.
Follow the steps below to get into BIOS and enable the onboard display connectors.
Step 2A. Reboot your system by restarting your computer.
Step 2B. As soon as the screen prompts for entry into the BIOS UEFI, hit the hotkey, which is usually indicated on-screen.
Standard hotkeys include DEL, F2, ESC, F1, or F12.
After hitting the hotkey, the BIOS UEFI opens up.
The BIOS UEFI is different across motherboard manufacturers. Here, it gets a bit tricky for first-time users.
This part is also where you need to start being careful about what buttons you press or settings you change.
Step 2C. Look for a tab or section saying “Advanced,” “Advanced Settings,” “Chipset,” or “Peripherals.”
Asus, MSI, and ASRock motherboards will typically have the “Advanced” or “Advanced Settings” options.
Gigabyte motherboards will have either the “Chipset” or “Peripherals” options.
Step 2D. Under the Advanced Settings, look for a drop-down menu with any of the following labels: IGPU Multi-Monitor, Internal Graphics, Processor Graphics, or IGD Multi-Monitor.
Notice that the options in the drop-down menu only include “Disabled” and “Enabled.”
Step 2E. Click on “Enabled,” save your BIOS settings, and reboot your system.
Step 3: Connect Your Display Device
After a smooth Windows startup, try connecting the additional display device you intend to use on any of the built-in display connectors of the motherboard.
If it works perfectly, then you’re good to go.
Otherwise, you might need to update the drivers for your processor’s integrated graphics.
Step 4: Update Drivers for the Integrated Graphics
If you have an Intel-based system, we recommend installing the latest Intel HD Graphics drivers using the Intel Driver and Support Assistant app.
This app automatically detects all Intel components on your system, looks for the latest available drivers, and installs them on your PC.
Similarly, AMD offers the Radeon Software Adrenalin 2020, a one-stop download and install utility for systems with Radeon Graphics and Ryzen Chipsets.
After updating all the drivers, restart your computer and reconnect the display monitor.
RELATED: How To Download Motherboard Drivers (Guide)
Conclusion
To sum it all up, enabling the built-in HDMI on your motherboard requires the presence of integrated graphics on your processor.
As soon as you find out that your processor doesn’t have integrated graphics, don’t bother going into BIOS to enable the onboard connectors.
If you want both dedicated GPU ports and integrated graphics connectors to work simultaneously, you will need to replace your CPU with one that has integrated graphics.
On the flip side, if you satisfy Step 1 in these procedures, go on ahead into BIOS, enable the connectors, and update all drivers.

